Custom TOTP authenticator
Using this method, admins can configure any TOTP authenticator for identity verification. ADSelfService Plus supports two types of TOTP tokens for authentication:
- Software TOTP token: Mobile or desktop applications that generate a time-based OTP based on the secret key provided by ADSelfService Plus during enrollment. These tokens can either be enrolled by the user through self enrollment or by the admin through bulk enrollment.
- Hardware TOTP token: Hardware devices that generate a time-based OTP based on the secret key burned into the hardware device. A seed file consisting of secret keys for the respective hardware devices will be provided by hardware vendors. These tokens can be enrolled only by the admin through bulk enrollment.
How it works
When a user reaches the Custom TOTP Authentication step, they open their configured TOTP app (or check their hardware device) and enter the current OTP. ADSelfService Plus validates the code against the secret key associated with the user's enrolled token. If the code matches and has not expired, authentication succeeds.
Each Custom TOTP configuration is independent — if a user moves from one self-service policy to another and the two policies do not share the same Custom TOTP Authenticator configuration, the user will be treated as not enrolled for the new policy.
Prerequisites
- You must have administrator access to the ADSelfService Plus portal.
- At least one self-service policy must be configured before enabling this authenticator.
- For hardware tokens: obtain the seed file from your hardware token vendor before beginning enrollment.
Configuration steps
- Navigate to your directory (AD or Entra ID) > Configuration > Self-Service > Multi-factor Authentication > Authenticators Setup.
- From the Choose the Policy drop-down, select a policy.
- Click Custom TOTP Authenticator.
- Enter the Authenticator Name, Passcode Length, Passcode Expiration Time, Passcode Hashing Algorithm, Account Name Format and upload the Authenticator Logo.
- Choose either Software Token or Hardware Token based on the type of token you wish to configure.
Note: If the Authenticator Logo is not uploaded, a default logo will be used.
- Click Save.
Step to enroll for custom TOTP authenticators
- Software tokens can be enrolled either by the user through self-enrollment or by admins through bulk enrollment (importing data via a CSV file or by fetching data from an external database).
- You can enroll for hardware tokens using two methods:
- By importing data via a CSV file
- By fetching data from an external database
Note: In case of using programmable tokens which allow the user to generate a secret key without admin intervention, it is recommended to configure custom TOTP authenticator as a software token.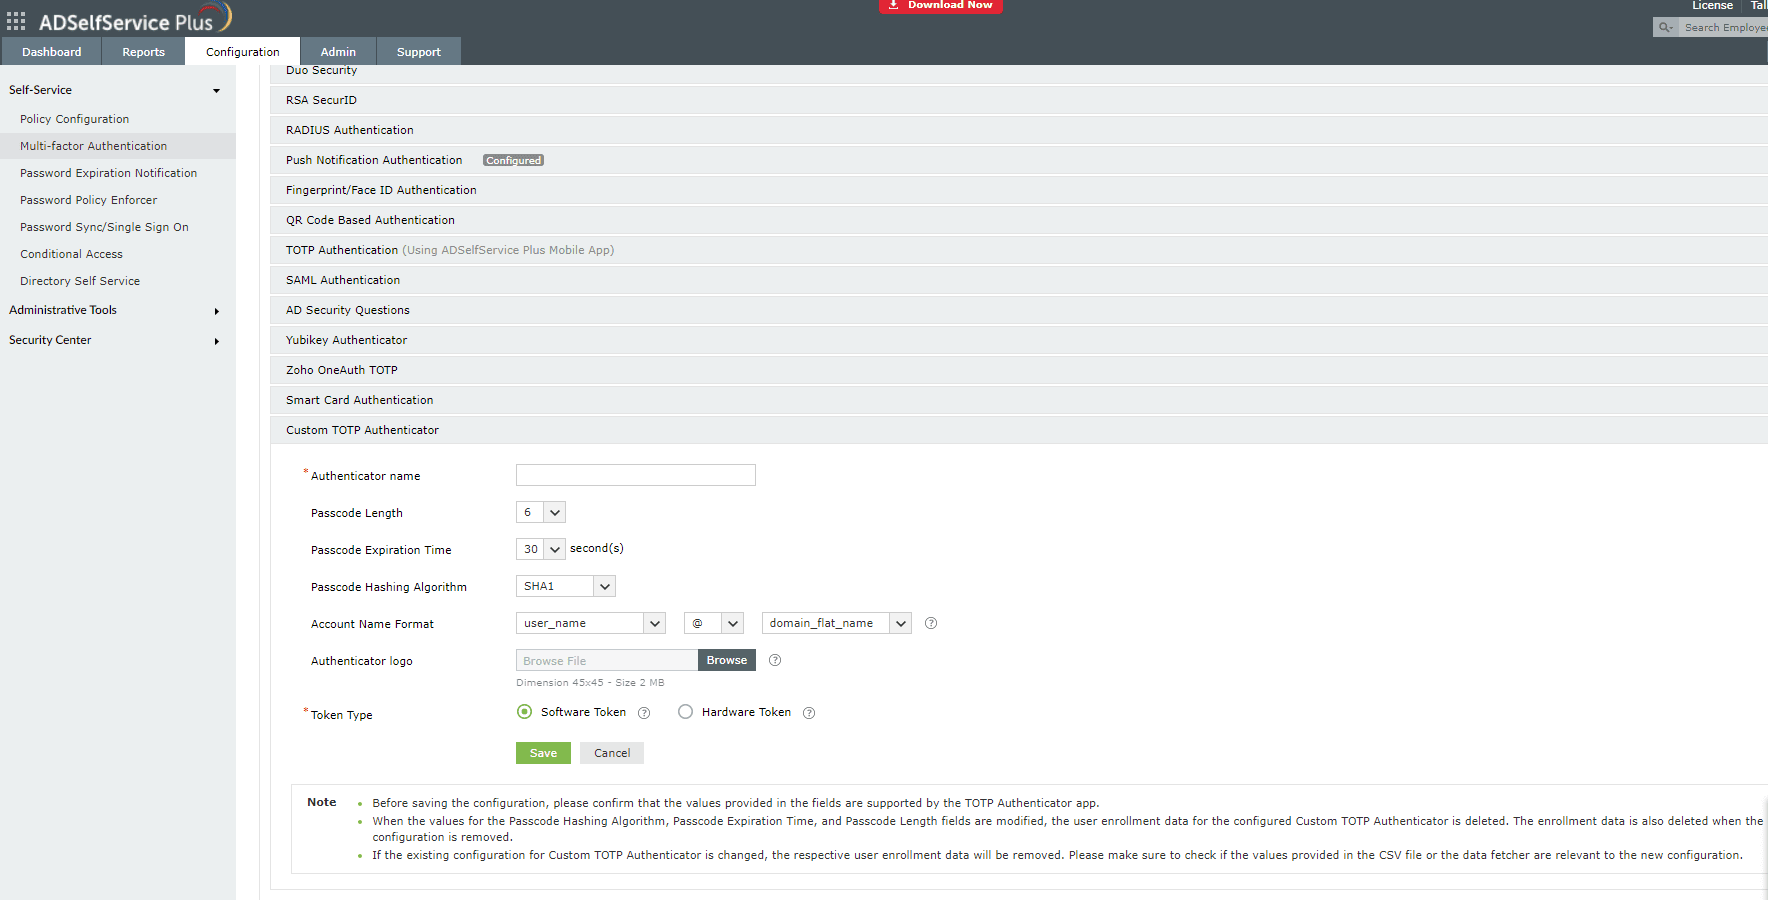
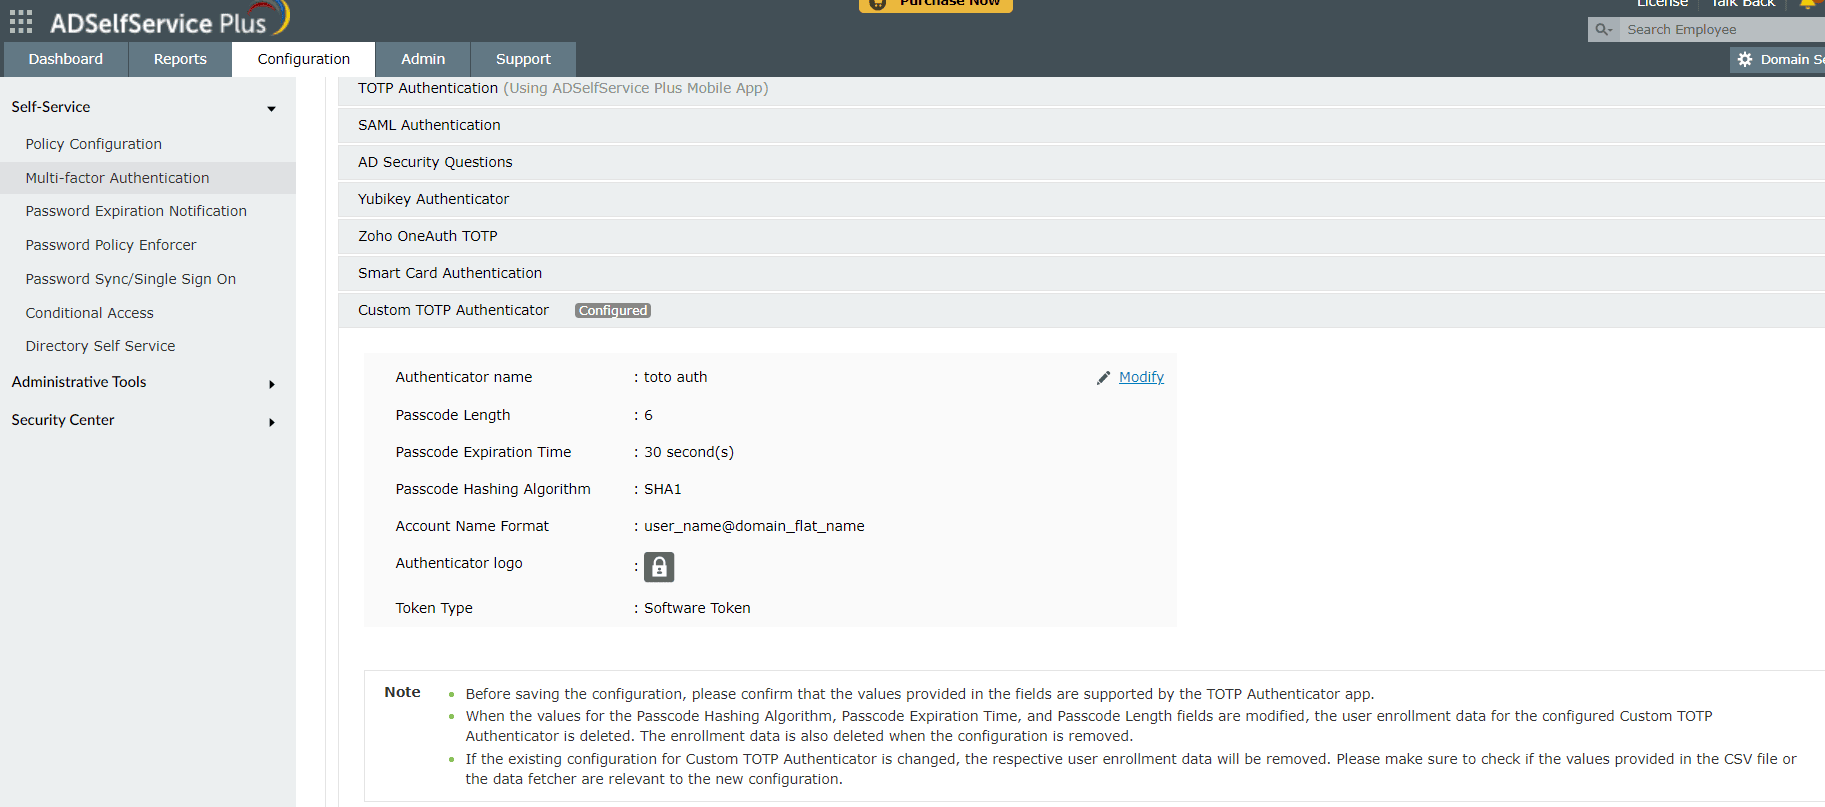
To modify the configuration:
- Navigate to Configuration > Self-Service > Multi-factor Authentication > Authenticators Setup.
- Click Custom TOTP Authenticator section.
- Click Modify and change the information provided wherever necessary.
- If the configuration has to be removed, click Remove Configuration.
- Click Save.
Note:
- When the configuration is modified or removed, the user enrollment data for that configuration will be deleted as well.
- When a user is shifted from one self-service policy to another and if both these policies do not have the same Custom TOTP Authenticator configuration, the user will be considered as not enrolled.
Tips
- Give each Custom TOTP Authenticator a descriptive Authenticator Name that identifies the specific app or hardware device — for example, Google Authenticator or SafeNet Token. This name is visible to users during enrollment and authentication, so a clear name reduces confusion when multiple TOTP authenticators are configured across different policies.
- Before modifying an existing Custom TOTP Authenticator configuration, notify affected users that their enrollment data will be deleted and they will need to re-enroll. An unexpected authentication failure during a password reset or machine login can be disruptive if users are not prepared.
- When deploying hardware tokens, confirm the seed file format is compatible with the CSV bulk enrollment method before distributing tokens to users. Mismatches between the seed file format and the expected import format are the most common cause of hardware token enrollment failures.