Configuring and managing domains
Configuring your Active Directory domain is the foundational step for enabling ADSelfService Plus to communicate with your AD environment. Once a domain is configured, the application automatically retrieves and synchronizes information about users, computers, groups, OUs, and domain policies at regular intervals. This data is stored in the product's database (either the built-in PostgreSQL or a configured external database) and is essential for operations including identity verification, password resets, account unlocks, notifications, and reporting.
Prerequisites
To configure a domain successfully, ensure you meet the following requirements:
- Service account permissions: You must have an AD account with one of the following privilege levels:
- Domain Admins group membership (Recommended): The account is a member of the Domain Admins group. While easier to configure, this is less secure and generally not recommended for production environments.
- Delegated permissions: The account is granted specific, granular permissions required for ADSelfService Plus operations. This follows the principle of least privilege and is the most secure approach. For a detailed list of minimum required permissions, please refer to this page.
- Network connectivity: The server hosting ADSelfService Plus must have reliable network access to the domain controllers of the domain being configured. Refer to the port requirements here.
- Time synchronization: Ensure system time is synchronized between ADSelfService Plus server and your domain controllers to prevent Kerberos authentication failures.
How it works
ADSelfService Plus acts as a client to your AD. The process works as follows:
- When a domain is added, ADSelfService Plus queries the DNS to discover available domain controllers.
- The application uses the provided service account credentials to establish an LDAP connection with the prioritized domain controller.
- ADSelfService Plus fetches AD objects (users, OUs, policies) and stores them locally. This allows the application to load user dashboards and reports instantly.
- If the prioritized domain controller becomes unreachable, the application automatically routes requests to the next available domain controller in the configured list.
- Real-time actions, such as password resets or account unlocks, are executed directly against Active Directory via the connected domain controller.
Steps to configure a new domain
While ADSelfService Plus automatically discovers and adds domains within its network during startup, you can manually add any required domain.
- Log in to the ADSelfService Plus admin portal and click the Domain Settings button in the top-right corner.
- In the Configured Domains section, click Add New Domain.
- Enter the Domain Name.
- Add domain controllers:
- Click the Discover button. Select the desired domain controllers from the list.
- If no domain controllers are found, you must manually add them using their fully qualified DNS hostnames. IP addresses are not supported.
- You can reorder the domain controllers in the list. The domain controller listed at the top is prioritized for communication. ADSelfService Plus will automatically fail over to the next domain controller in the list if the prioritized one is unavailable.
- Click Add to confirm your selection.
- Provide credentials:
- Check the Authentication checkbox.
- Enter the Domain Username and Domain Password of a privileged account (refer Prerequisites).
- Click Save to finalize the domain configuration.
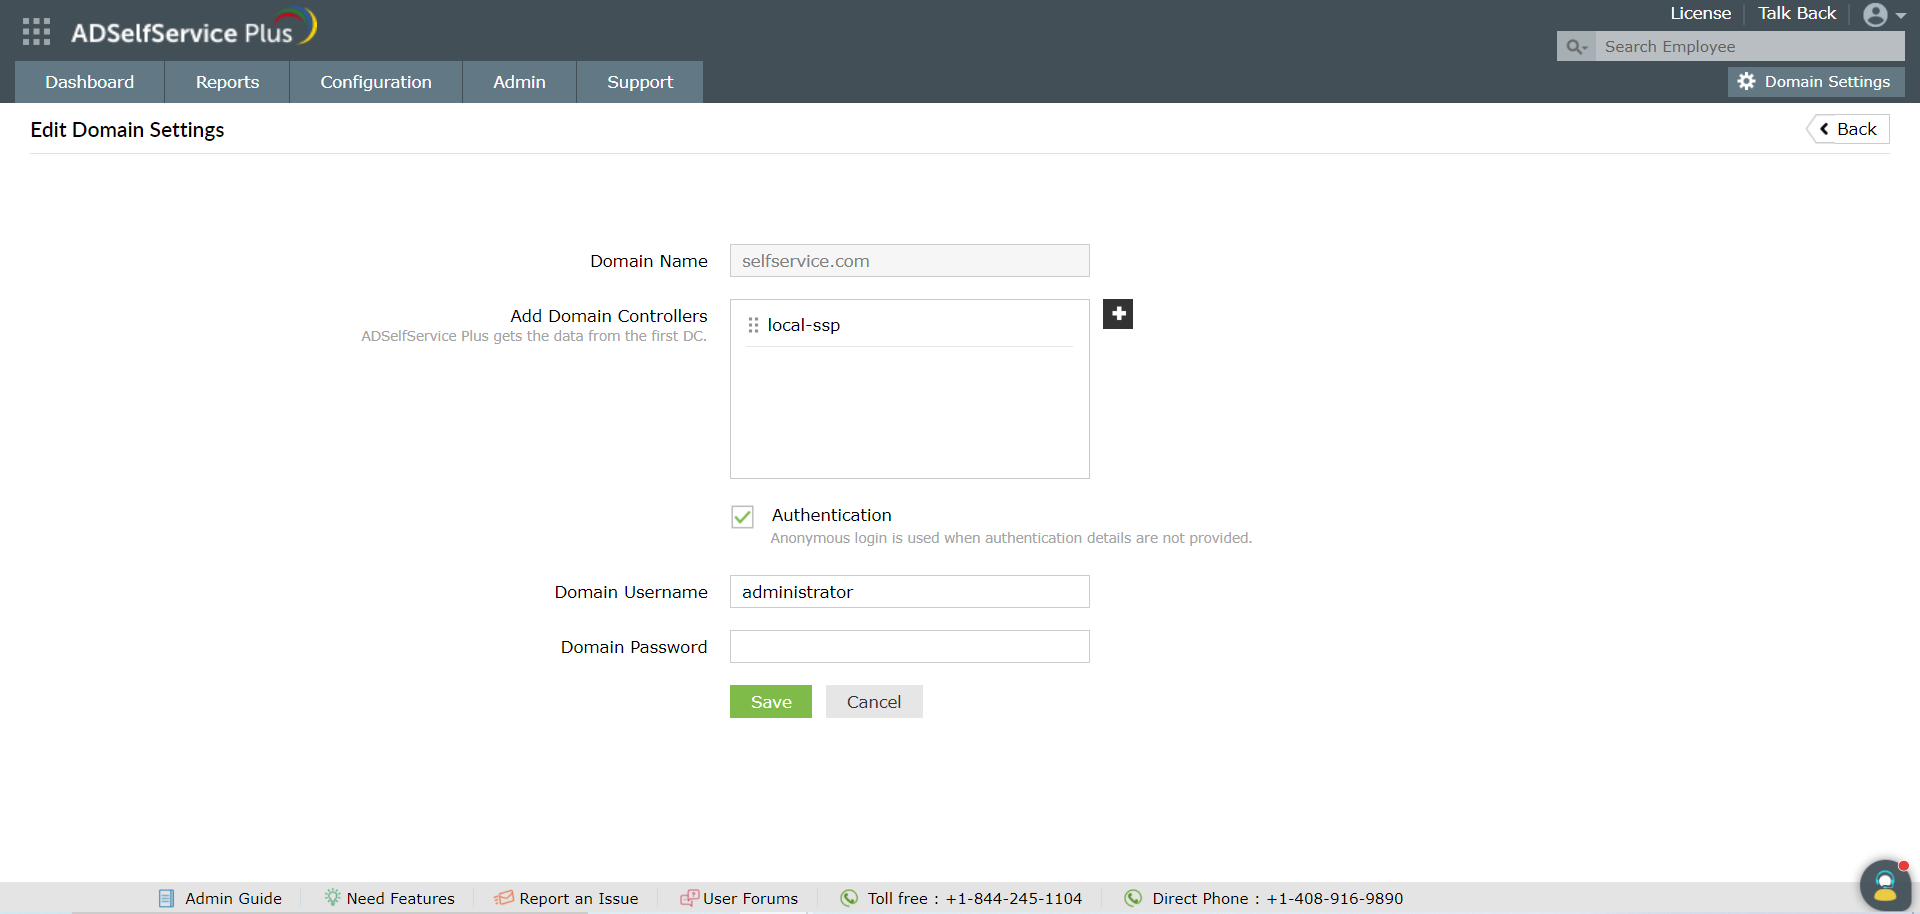
Fig 1: Configuring a new domain in ADSelfService Plus.
Manage configured domains
The configured domains section provides a centralized view of all your domains. You can view the status and perform management actions using the icons in the Actions column.
| Column | Description |
|---|---|
| Domain Name | The FQDN of the configured Active Directory domain. |
| Domain Controllers | A list of the domain controllers ADSelfService Plus will communicate with. |
| Username | The service account used for authentication and data synchronization. |
| Domain Display Name | A custom, user-friendly name for the domain that appears on the login screen and in reports. |
| Status | Indicates the health of the domain connection and permissions. A Success status means the service account has the necessary rights and the DCs are reachable. A Failure status indicates a permissions issue or that a DC is offline. |
The icons under the Actions column allow you to manage each domain.
| Icon | Action | Description |
|---|---|---|
| Default Domain | Set as default domain | Makes this domain the default selection in the product. |
| Edit | Edit domain details | Modify the service account credentials and add or remove domain controllers. Note: Editing domain details does not trigger AD synchronization. Synchronization occurs only based on the schedule configured in the AD Synchronizer or when domain object information is manually updated. |
| Update | Update domain objects | Manually trigger an immediate synchronization with AD. You can choose to update specific objects like users, computers, OUs, groups, or domain policies. Note: Triggering an immediate synchronization of group objects may take a significant amount of time, depending on the number of groups and group memberships in your domain. |
| Delete | Delete domain | Permanently remove the domain and all associated data from ADSelfService Plus, including policy configurations and user enrollment information. This action is irreversible. |
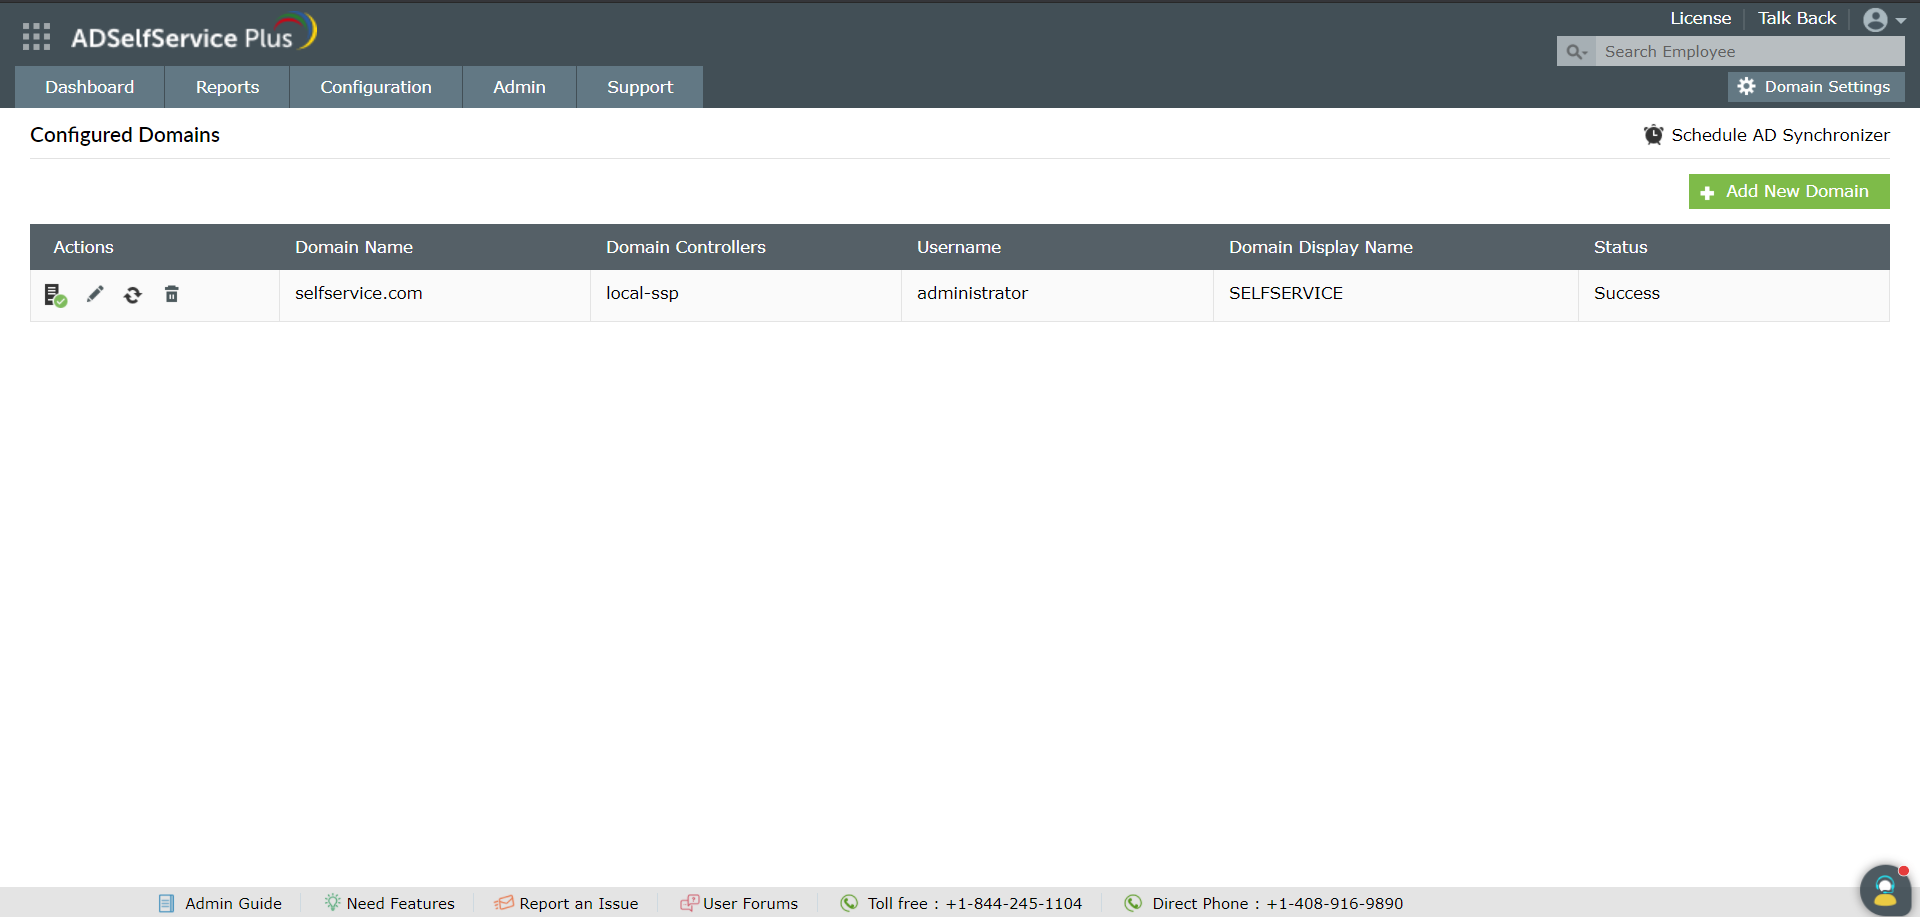
Fig 2: Managing configured domains in ADSelfService Plus.
Schedule automatic domain synchronization
To ensure the data in ADSelfService Plus is consistent, you can schedule regular, automatic synchronization with AD.
- On the Domain Settings page, click the Schedule AD Synchronizer button in the top-right corner.
- In the pop-up window, toggle the Enable AD Synchronizer switch to on.
- Set the Schedule Frequency to the desired interval (e.g., Daily, Hourly) and time for the sync to run.
- Click Save.
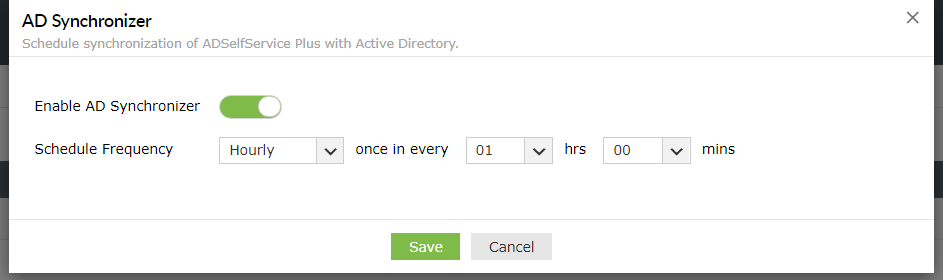
Fig 3: Scheduling AD domain synchronization in ADSelfService Plus.
Tips
- Performance: In the Domain Controllers list, place the domain controller that is geographically or logically closest to the ADSelfService Plus server at the top of the list to minimize network latency.
- Data integrity: Schedule the AD Synchronizer to run during off-peak hours to ensure the data is consistently up-to-date without impacting performance during business hours.