Starting and Accessing ADSelfService Plus
In this section, we will be looking at the multiple ways to start and access ADSelfService Plus:
-
Starting ADSelfService Plus
-
Accessing the ADSelfService Plus Client
-
Accessing ADSelfService Plus from the native logon screen
-
Accessing ADSelfService Plus from mobile devices
-
Stopping ADSelfService Plus
1. Starting ADSelfService Plus
Note:
When you run ADSelfService Plus as an application, it uses the privileges of the user logged on to the computer, so ensure that the account has permission to access the product's installation folders. If you choose to run ADSelfService Plus as a service, it utilizes the service account's privileges.
Recommendation:
-
Exempt ADSelfService Plus from the anti-virus deployed in your environment so it is not flagged by mistake.
When ADSelfService Plus is installed as a Service
ADSelfService Plus is started using the system account when run as service.
To start ADSelfService Plus as a service:
-
Click on Start.
-
Search for Services.
-
Alternatively, you can open the Run window, type services.msc and click OK.
-
In the Services tab that appears choose ManageEngine ADSelfService Plus.
-
Select the Start the service option on the left side.
-
Click on Start again. Go to ADSelfService Plus and click on Start ADSelfService Plus.
When ADSelfService Plus is not installed as a Service
In this case, ADSelfService Plus is started using the user account. To start it, go to Start → Programs → ADSelfService Plus → Start ADSelfService Plus. On starting ADSelfService Plus, the client is automatically launched in the default browser.
Note:
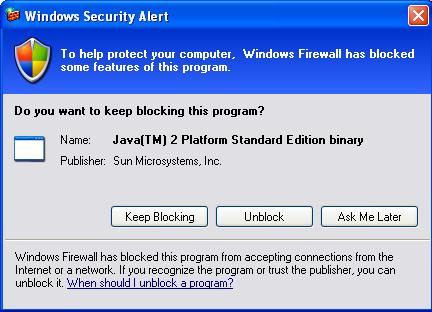
When ADSelfService Plus is started in Windows Server 2003 machines with a firewall enabled, Windows might display security alerts asking whether to block or unblock the following program :
-
Java(TM) 2 Platform Standard Edition binary - Java.
You should unblock these programs to start ADSelfService Plus

Fig: Java Alert
2. Accessing the ADSelfService Plus client
Once the product is started using the Start ADSelfService Plus option, the ADSelfService Plus client is automatically launched on the web browser. The client can also be accessed by clicking on the desktop icon when installed as an application or a service. To access ADSelfService Plus client manually:
-
Open a web-browser and type http://hostname:8888 in the address bar. Here, hostname refers to the DNS name of the machine where ADSelfService Plus is running and 8888 denotes the default port number (if you changed the default port number, enter that port number).
-
To login, enter 'admin' in both the username and password fields (for first-time users). You will be prompted to change the password once you login to the portal post applying the product license. Once you change the password, use the new password to login to the portal while using the default admin account.
3. Accessing ADSelfService Plus from the native logon screen
-
ADSelfService Plus can also be accessed right from the logon screen of the end-user Windows, macOS and Linux machines, so users can reset their passwords or unlock their accounts without having to use someone else's machine.
-
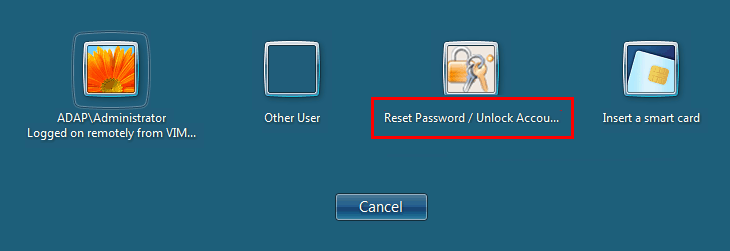
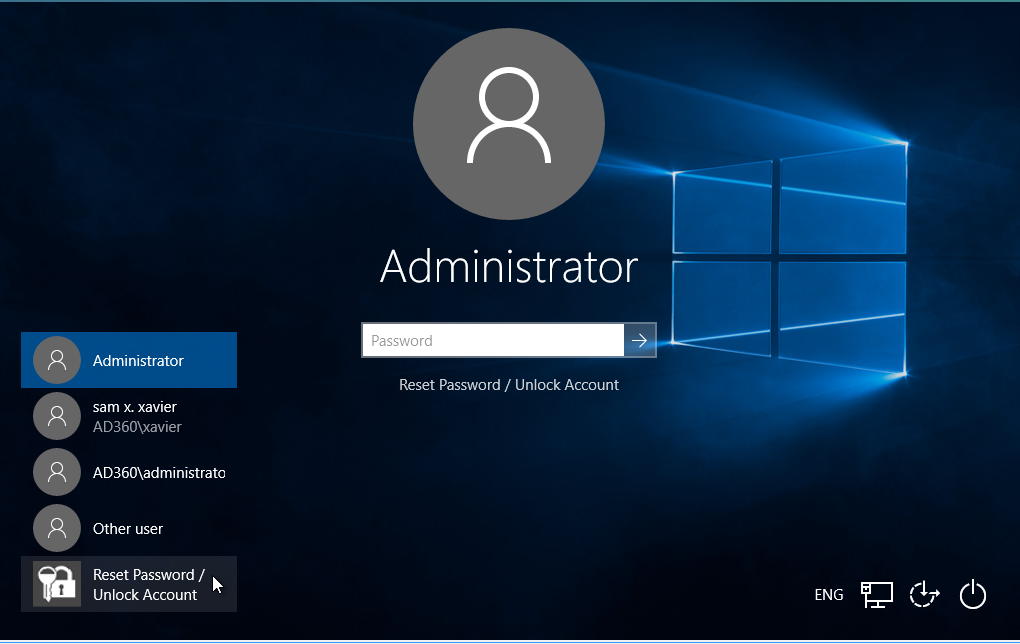
To access ADSelfService Plus from the logon screen, deploy the ADSelfService Plus login agent on the users' machines. It will extend the Windows, macOS and Linux logon dialog screen with the self-service (password reset and account unlock) functionality as shown in the image below:

Fig: ADSelfService Plus Credential Provider for Windows 7

Fig: ADSelfService Plus Credential Provider for Windows 10
For further info, refer GINA/Mac/Linux Installation.
4. Accessing ADSelfService Plus from Mobile Devices
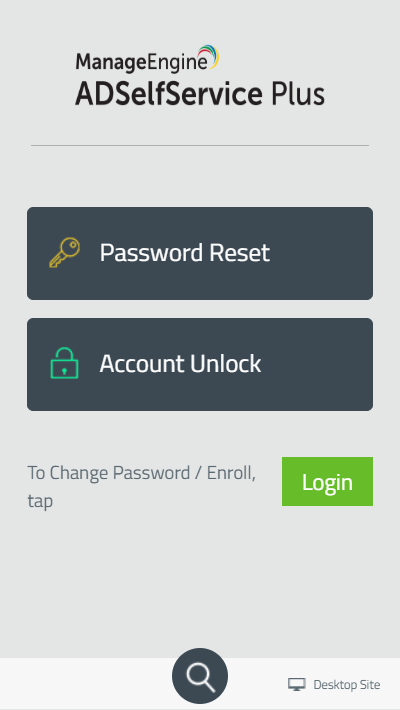
To make password self-service process easier for end users and to prevent them from depending on other users' computers and the ADSelfService Plus login agent, ADSelfService Plus offers a native app for iOS & Android and also a Mobile WebApp for other platforms.
You can download the iOS app from the App Store and the Android App from the Play Store. The mobile web app can be accessed from mobile web browsers like Google Chrome.
Setting up the iOS and Android Apps
Before users can start using the app for password self-service, they have to configure the server settings so that the app can connect and communicate with the ADSelfService Plus server in your organization.
ADSelfService Plus mobile app can be configured in three ways:
- Manual configuration by user
- Configuration via QR code
- Configuration via Mobile app deployment feature
i. Manual configuration by user:
To configure their ADSelfService Plus mobile app manually, users have to perform the following steps:
- Open ADSelfService Plus mobile app
- Tap Server Settings
- In the Server Settings page, enter the Server Name or IP Address of the server in which ADSelfService Plus is running
- Enter the Port number
- Enable SSL if necessary by sliding the ‘Protocol’ toggle to HTTPS
- Tap Save to finish
ii. Configuration via QR code:
To automatically configure the ADSelfService Plus mobile app via QR code, users have to follow the following steps:
- Open ADSelfService Plus Mobile App and tap the Server Settings link in the home screen.
- In the bottom-left corner, tap Scan QR Code link in the home screen.
- Open web browser and login to self-service portal. [You can also click on either the Reset Password or Unlock account button].
- Click Mobile Access button.
- Scan the QR code included in the pop up using your ADSelfService Plus Mobile App to configure the server settings automatically.
Note:
If you have configured the Access URL in the connection settings of ADSelfService Plus, then that URL will be automatically used in the QR code. For more information about Access URL, please
click here.
iii. Configuration via Mobile app deployment feature (Only for iOS):
The Mobile app deployment feature of ADSelfService Plus lets you remotely install and the ADSelfService Plus mobile app on the mobile devices of users. For this the first step is to install MDM profiles in these devices. The next step is to install the mobile app in these devices remotely and configure the server settings.
To do this:
- Log in to ADSelfService Plus.
- Click Configuration -> Administrative Tools -> Mobile App Deployment.
- Select your domain and click Configured Devices.
- Select the mobile devices to install ADSelfService Plus mobile app.
- Select the Install and configure app option.
- Click Install to install and configure mobile app in the selected devices automatically.
Note:
- The following values will be used for configuring the server
-
Server name : The host name provided in the certificate issued by your Certificate Authority.
-
Port number : Port in which ADSelfService Plus is running.
-
Protocol : HTTPS
- Furthermore, you can also use other MDM tools like AirWatch and Mobile Device Manager Plus to configure ADSelfService mobile app for users. While using other MDM tools, use the following keys as parameters or property values
- serverName(e.g. demo.adselfserviceplus.com)
- serverPort(e.g. 443)
- serverProtocol(e.g. https)
Launching the Mobile Web App:
The Mobile Web App can be launched from the web browser of any mobile device. To access ADSelfService Plus' Mobile Web App:
-
Open a web browser from the mobile device.
-
Type the URL of ADSelfService Plus portal. For eg: Enter http://<hostname>:8888 in the address bar of the mobile browser. Here hostname refers to the machine where ADSelfService Plus is running and 8888 denotes the port number.
The following functionalities are supported by the mobile apps:
-
Reset Password
-
Unlock Account
-
Change Password
-
Enrollment
-
Push Notification

5. Stopping ADSelfService Plus
- To stop ADSelfService Plus, select Start → Programs → ADSelfService Plus → Stop ADSelfService Plus
-
To stop ADSelfService Plus when installed as a service:
-
Click on Start.
-
Search for Services.
-
Alternatively, you can open the Run window, type services.msc and click OK.
-
In the Services tab that appears choose ManageEngine ADSelfService Plus.
-
Select the Stop the service option on the left side.


