SMS Settings
Overview
The SMS Settings tab configures how ManageEngine ADSelfService Plus delivers text messages (SMS), such as one-time passcodes for multi-factor authentication (MFA) and SMS notifications. It is the second tab on the Mail / SMS Server Settings page, under Admin > Product Settings > Mail / SMS Settings, and applies to both Active Directory and Microsoft Entra ID modes. You select an SMS Provider, a GSM modem, Clickatell, or a custom gateway, and supply the connection details for it.
Prerequisites
The requirements depend on the provider you choose:
- You are signed in to the ADSelfService Plus admin portal with administrator privileges.
- For a GSMModem provider: the GSM modem supports 7-bit, 8-bit, and 16-bit encoding and is connected to the server's serial communication port.
- For Clickatell: a product license with the SMS add-on pack (AdventNetLicense.xml) and an SMS Gateway license file (SMSGateway.xml).
- For a Custom gateway: the connection details from your SMS provider (the HTTP URL and parameters, or the SMTP or SMPP server details).
How it works
ADSelfService Plus sends each message through the provider you select. A GSM modem sends over the server's serial port, while Clickatell and custom HTTP, SMTP, or SMPP gateways send over the network. A message longer than 160 characters is sent as multiple messages. The SMS server must be configured here before any SMS passcode or notification can be delivered.
Configuration instructions
Opening the SMS Settings tab
- Log in to the ADSelfService Plus admin portal with administrator privileges.
- Navigate to Admin > Product Settings > Mail / SMS Settings.
- Click the SMS Settings tab.
- From the SMS Provider drop-down, choose GSMModem, Clickatell, or Custom. The fields below change to match the provider.
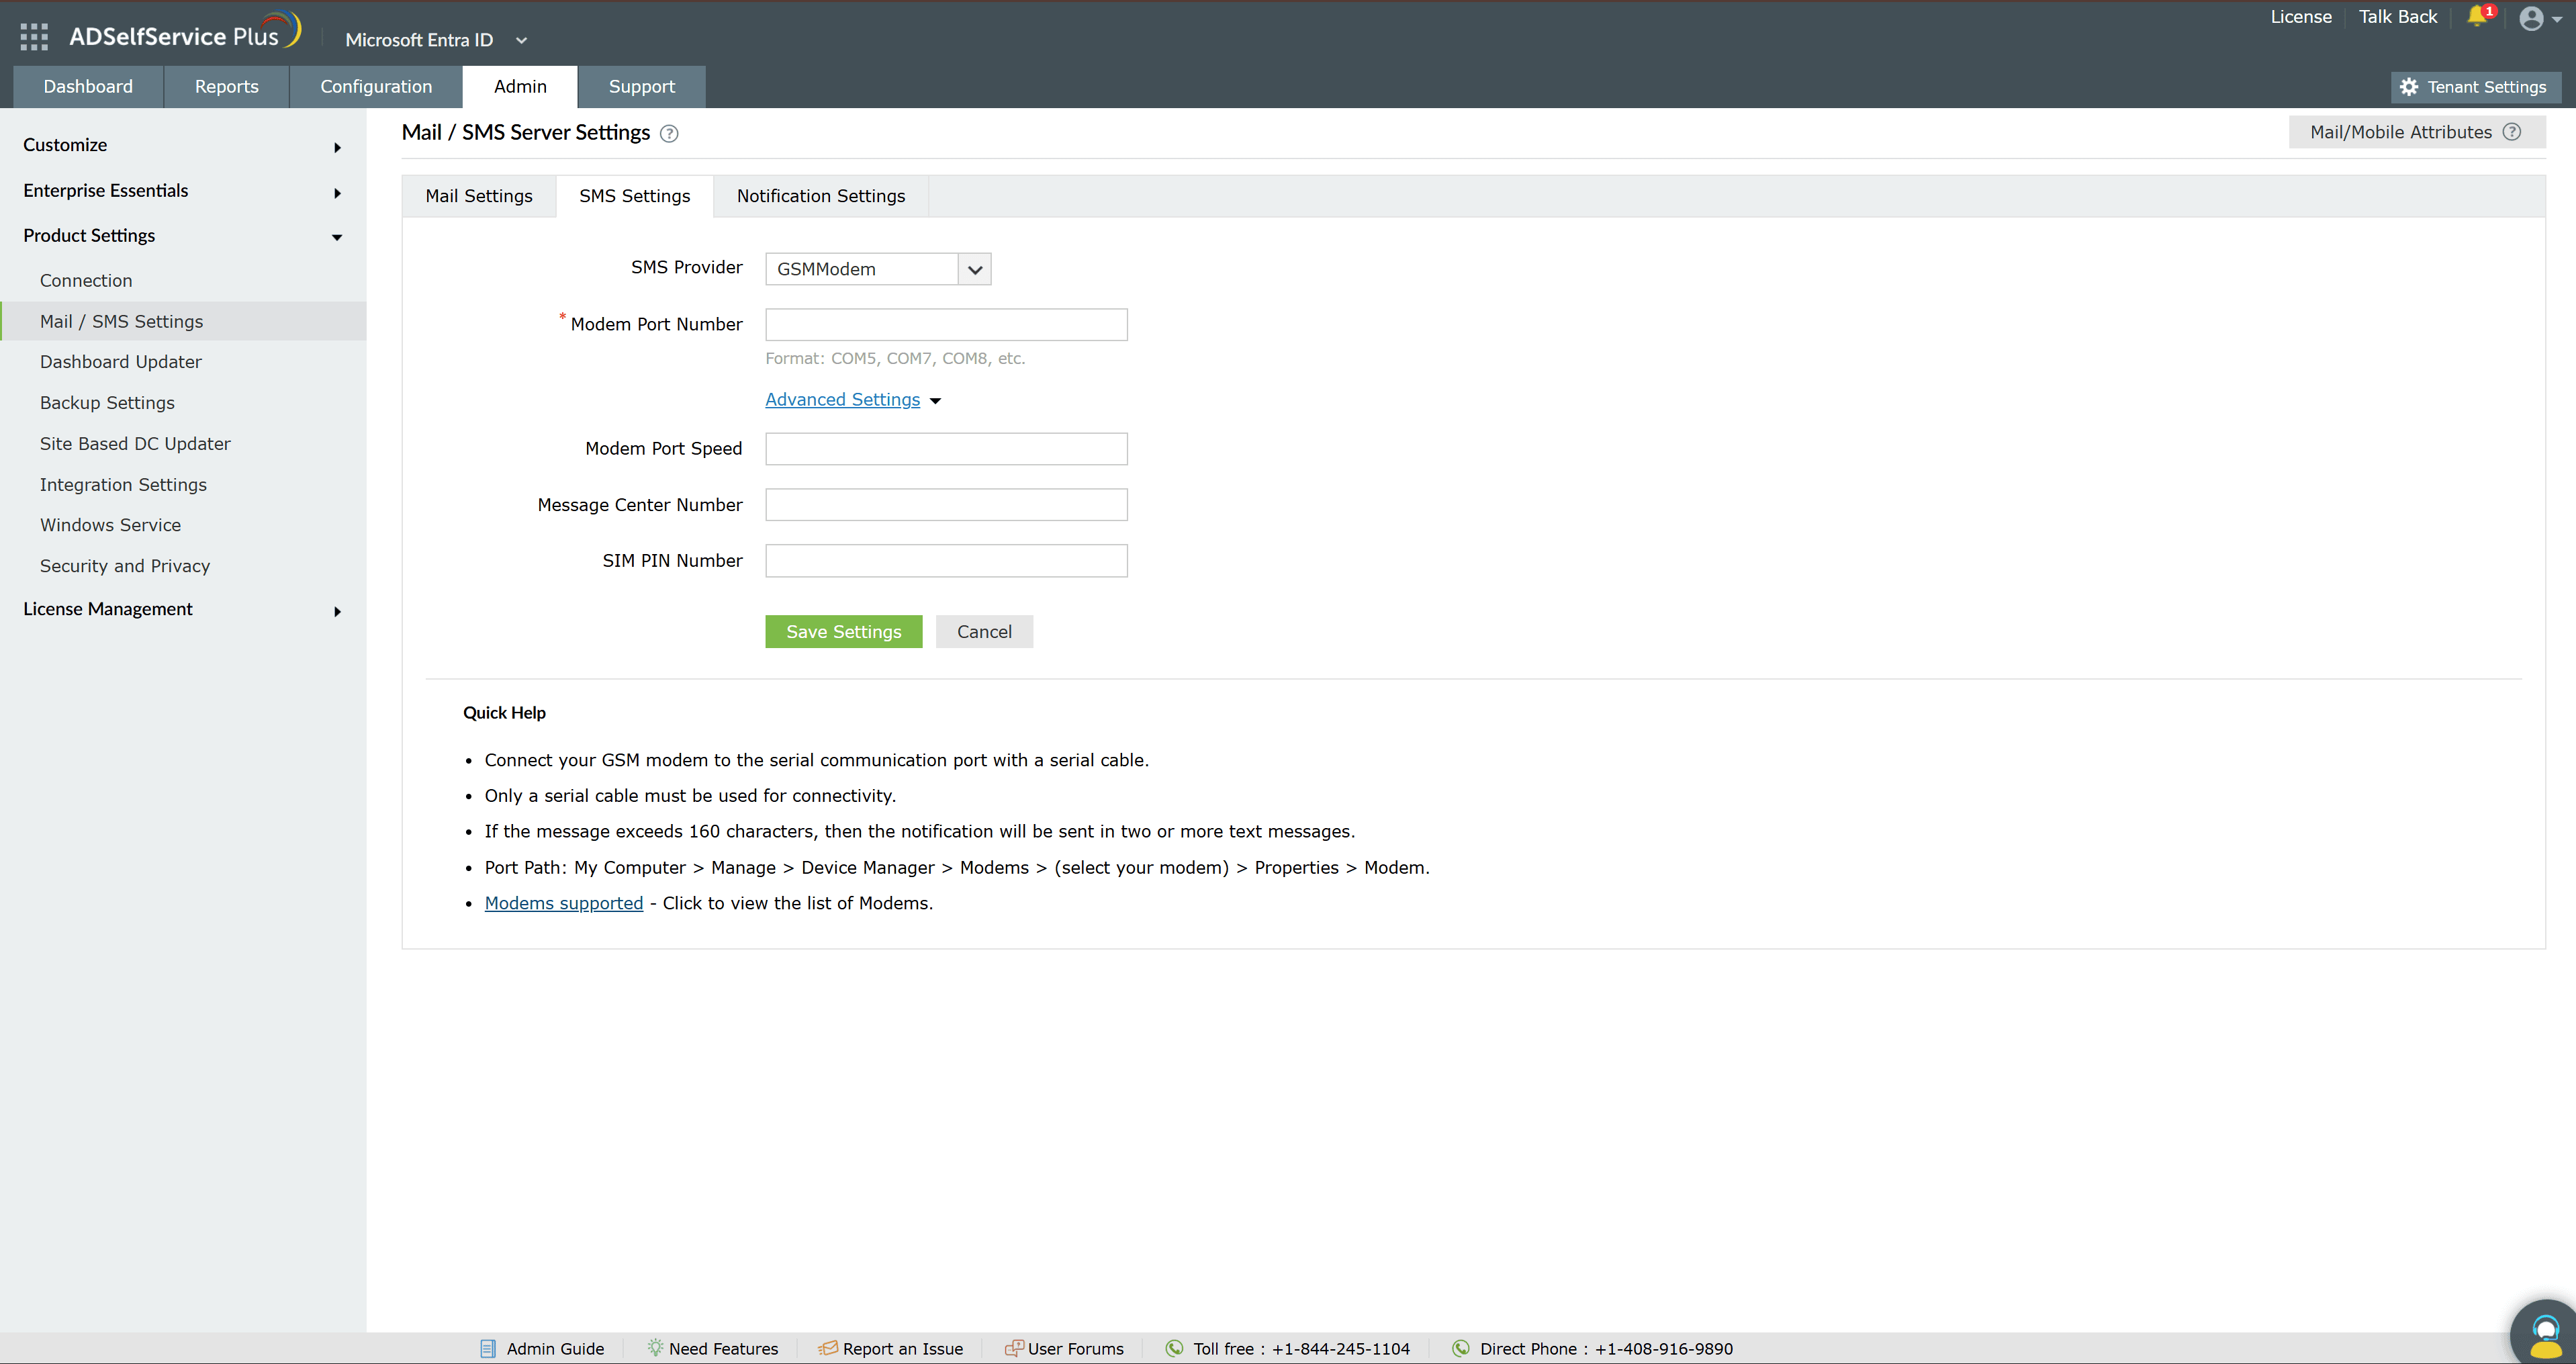
Using a GSM modem
- Connect the GSM modem to the server's serial communication port.
- From SMS Provider, select GSMModem.
- In Modem Port Number, enter the port the modem is connected to. The on-screen hint reads Format: COM5, COM7, COM8, etc.
- Click Advanced Settings, then provide the Modem Port Speed, Message Centre Number, and SIM PIN Number.
- Click Save Settings.
| Note: A message longer than 160 characters is sent as multiple messages. To find the modem port, go to My Computer > Manage > Device Manager > Modems > (your modem) > Properties > Modem. |
|---|
Using Clickatell
- From SMS Provider, select Clickatell.
- Select Please notify me when my credit balance reaches and specify the number of credits.
- Enter the email address that should receive the low-balance alert.
- Click Save.
| Note: Clickatell requires the SMS add-on (upload AdventNetLicense.xml and SMSGateway.xml from the License link). A message of up to 70 characters uses one credit. Enter mobile numbers in international format (country code then number, with no leading zero and no + or spaces, for example 111234123456); users on the Do Not Disturb list do not receive SMS. |
|---|
Using a custom SMS gateway
Select Custom as the SMS Provider, then choose the transport from the Send SMS via drop-down: HTTP, SMTP, or SMPP. Complete the fields for the transport you chose.
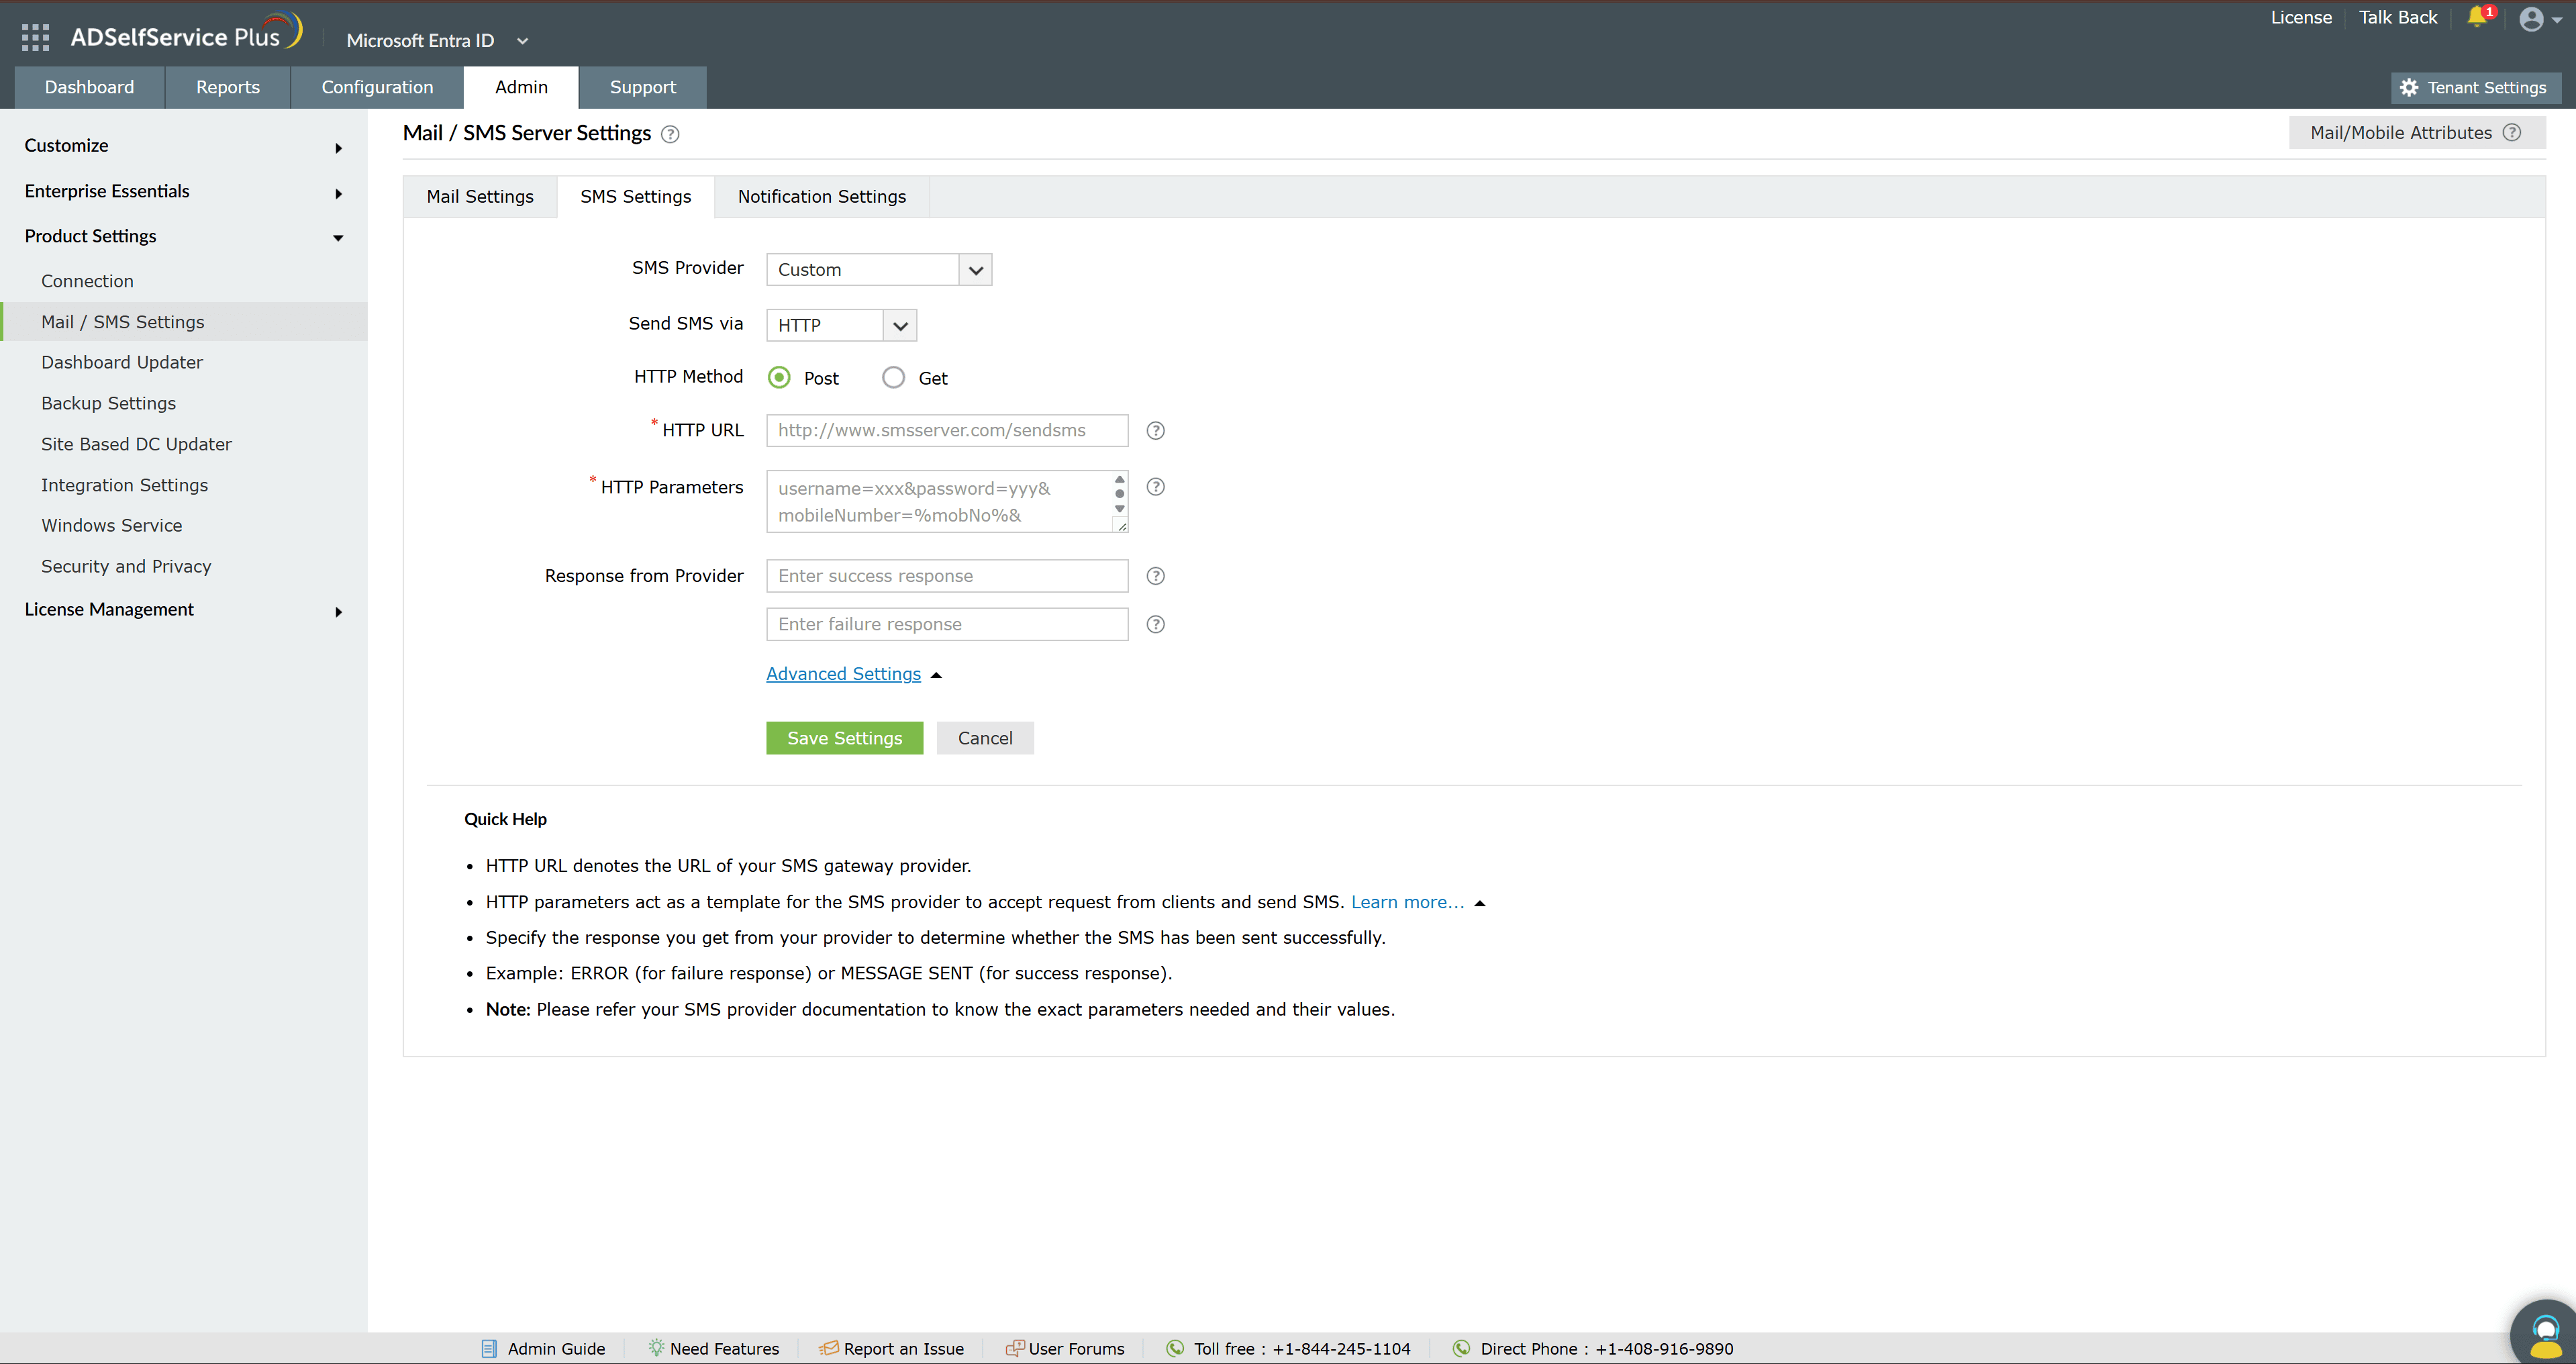
HTTP
- Select HTTP from Send SMS via.
- Choose an HTTP Method: Post or Get.
- Enter the HTTP URL of your SMS gateway provider.
- Specify the HTTP Parameters your provider requires, including the user's mobile number and the message. Separate parameters with an ampersand (&).
- Specify the Success and Failure response from the provider.
- Enter any HTTP Request Headers your provider requires.
- If the provider expects unicoded or encoded messages, select Convert Message into Unicode or Encode message.
- Click Save Settings.
| Note: Use these macros in the HTTP Parameters: %mobNo% (the user's mobile number), %message% (the message content), %uniqueId% (a random unique ID per request), %currentTime% (the request timestamp), and %expiryTime% (when the request expires). |
|---|
SMTP
- Select SMTP from Send SMS via.
- In From Address, enter the email address the SMS is sent from.
- In To Address, enter the mobile-number macro followed by your provider's email address, for example %mobNo%@clickatell.com.
- Provide the Subject and the Content to be sent.
- Click SMTP Server Settings, then enter the SMTP Server, SMTP Server port, Username, and Password, and choose a Connection Security option.
- Click Save Settings.
| Note: If you do not configure SMTP Server Settings here, ADSelfService Plus uses the mail server configured on the Mail Settings tab. |
|---|
SMPP
- Select SMPP from Send SMS via.
- Enter the SMPP Server Name and SMPP Server Port number.
- Provide the Username and Password, then click Advanced Settings.
- Enter the ESME System Type and select an ESME Bind Type: Blind Transmitter or Transceiver.
- Specify the SMPP Time-Out and SMPP Source Address.
- Select the Source Address' TON, Source Address' NPI, Destination Address' TON, and Destination Address' NPI.
- Click Save Settings.
| Note: TON is the type of number and NPI is the numbering plan indicator; select the values your SMPP provider specifies. |
|---|
Limitations
- A message longer than 160 characters is sent as multiple messages; with Clickatell, one credit covers up to 70 characters.
- Clickatell requires the SMS add-on license (AdventNetLicense.xml and SMSGateway.xml).
- Mobile numbers must be in international format (country code then number, with no leading zero, +, or spaces), and users on the Do Not Disturb list do not receive SMS.
Tips
- Configure the SMS server before you rely on SMS passcodes or notifications, then choose which events send an SMS on the Notification Settings tab.
- For a custom HTTP gateway, use the macros (%mobNo%, %message%) so ADSelfService Plus inserts the recipient and text into each request.
- For a custom SMTP gateway, leaving SMTP Server Settings empty falls back to the mail server on the Mail Settings tab.
- Configure the mail server on the Mail Settings tab as well, so email and SMS notifications can both be delivered.