Configuring self-service policies
In ADSelfService Plus, self-service features are assigned to users through self-service policies. Each policy links a specific set of self-service features to a group of users, letting you control and customize the level of access granted to different user segments within your organization. Self-service policies work the same way for both Active Directory and Microsoft Entra ID—the only differences are the directory you select and how you scope the policy: Active Directory policies are scoped by domain, organizational unit (OU), and group, while Entra ID policies are scoped by domain and group.
A self-service policy can include any combination of the following features:
- Self-service password reset: Enables users to securely reset their own passwords without requiring IT assistance. (Active Directory and Entra ID)
- Change password: Enables users to proactively change their passwords without contacting IT support. (Active Directory and Entra ID)
- Self-service account unlock: Enables locked-out users to unlock their own accounts without contacting the IT help desk. (Active Directory only)
- Directory self-update: Enables users to update their own profile information in the directory, and subscribe to or unsubscribe from mail groups. (Active Directory only)
- You can configure any number of self-service policies for a given domain, OU, or group.
- If a user falls under multiple policies due to overlapping domains, OUs, or groups, the policy with the highest priority (listed first) will take effect.
- Policies can be configured based on users’ domains, OU (Active Directory), and group memberships, allowing granular control over who can access which ADSelfService Plus features.
How to create a self-service policy
- From the directory selector at the top of the page, choose Active Directory or Microsoft Entra ID, depending on the directory you want to create the policy for.
- Navigate to Configuration > Self-Service > Policy Configuration.
- Click the Add New Policy button.
- Enter a descriptive policy name.
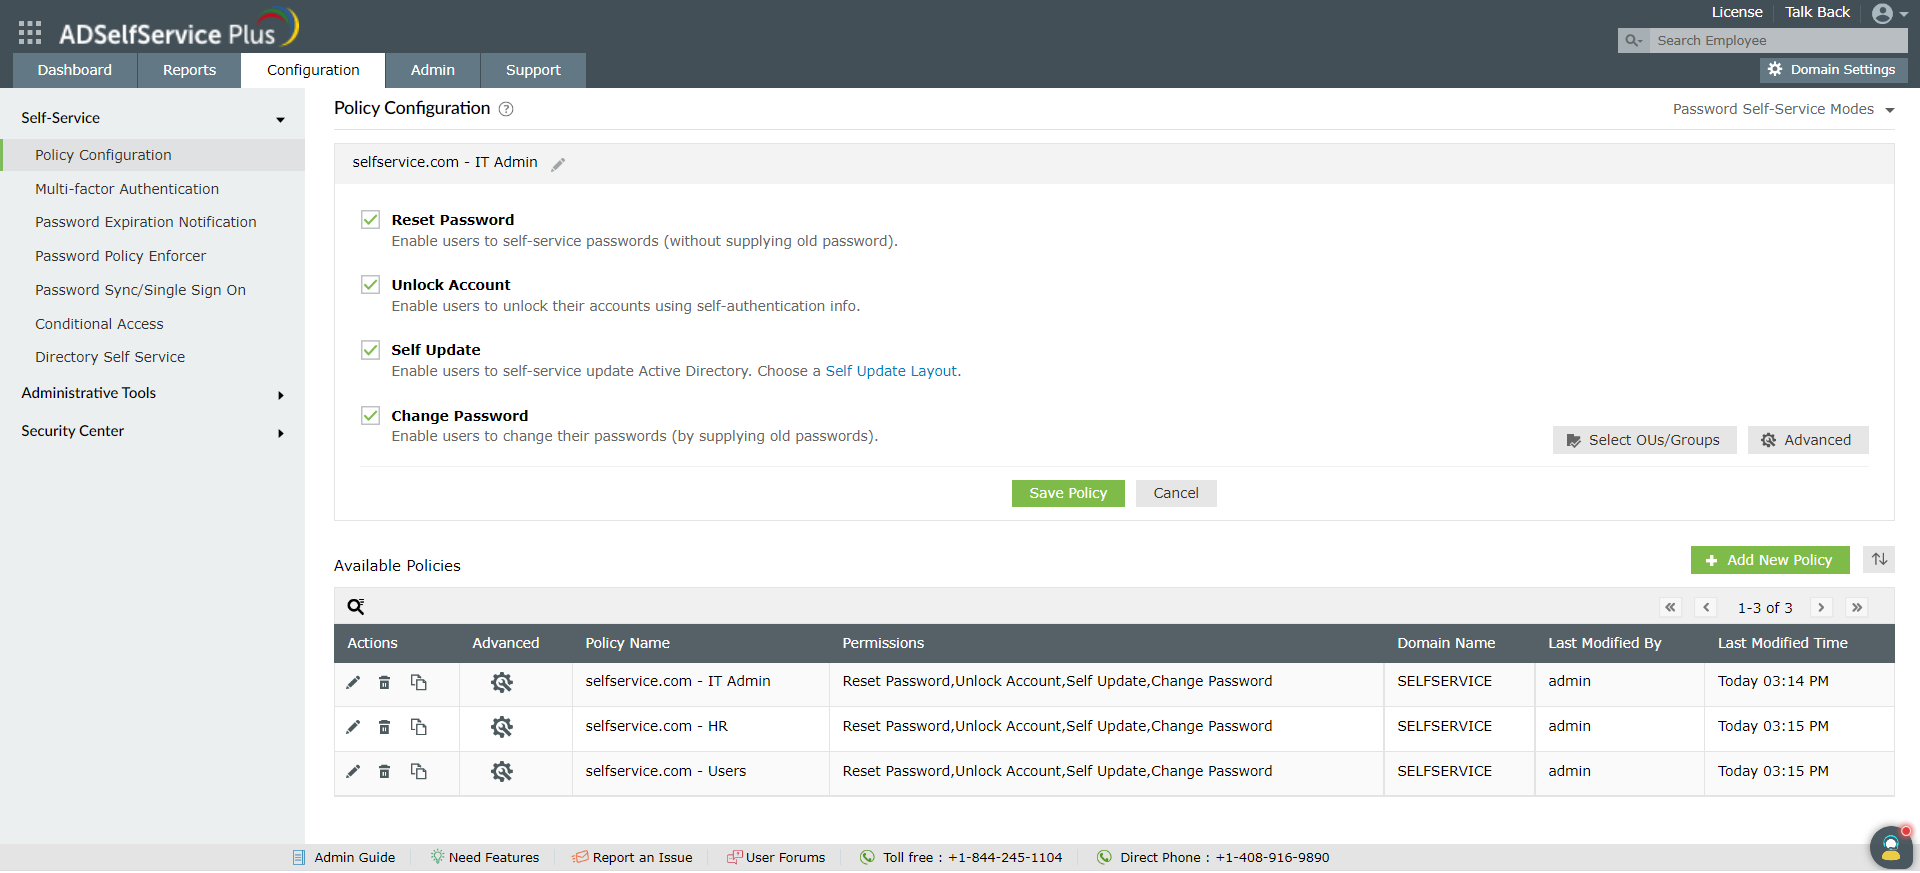
- Select the self-service features you want to enable for this policy (for example, Reset Password). You need to select at least one self-service feature.
-
Define the policy’s scope:
- Active Directory: Click Select OU(s)/Groups. You can apply the policy to all users in the selected domain, or only to specific users based on their OU or group membership.
- Microsoft Entra ID: Click Select Domains/Groups. You can apply the policy to all users in a domain, or target specific domains and groups.
- Click OK to confirm the selection.
- Click Save Policy.
How to manage existing policies
From the main policy configuration screen, you can perform the following actions on any existing policy:
-
Update: Click the edit icon (
 ) to modify a policy’s features or its assigned domains and groups.
-
Delete: Click the delete icon (
 ) to remove a policy. A policy cannot be deleted if it is the only one remaining for a configured domain, or if users assigned to it have enrolled in multi-factor authentication.
-
Duplicate: Click the copy icon (
 ) to create a new policy based on an existing one, which you can then modify.
-
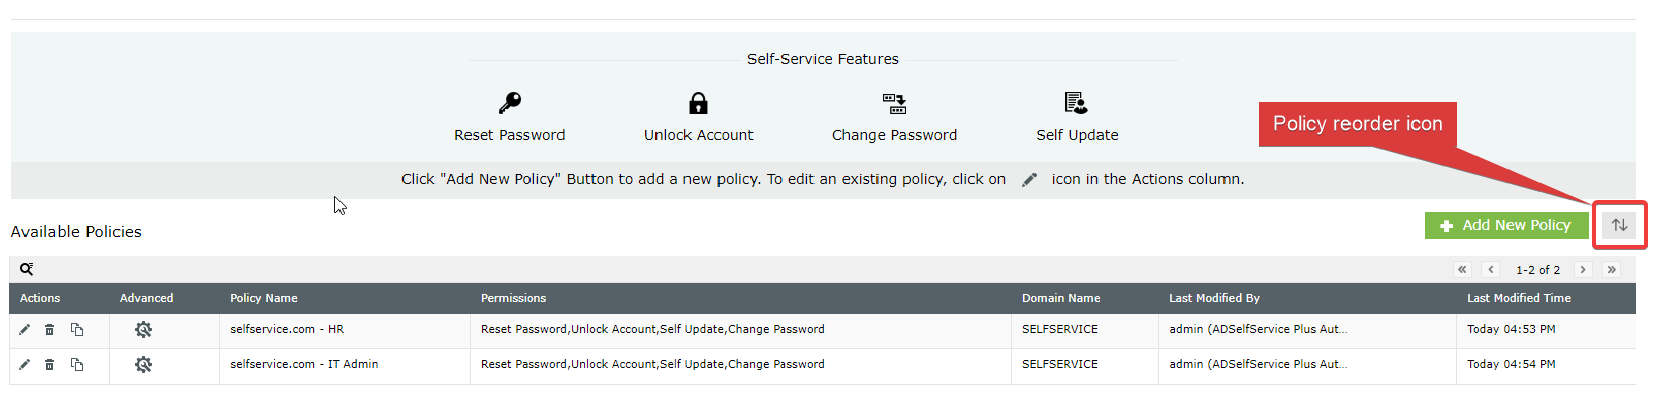
Prioritize: Use the reorder arrows next to the Add New Policy button to change the policy execution order. The policy at the top of the list has the highest precedence.