Blocked Users Report
The Blocked Users Report generates the list of users who have failed MFA verification during password resets or account unlocks and have been blocked from accessing ADSelfService Plus. This report enables administrators to monitor MFA security blocks, manage user access restoration, and maintain security compliance across the organization.
How it works
When users exceed the maximum allowed failed MFA verification attempts during password reset or account unlock processes, ADSelfService Plus automatically blocks their access and logs the blocking event. The report captures key details including the username, blocking timestamp, scheduled unblock time, domain name, failed attempt count, and authenticators used.
Administrators can view currently blocked users in real-time and access historical blocking data to track security patterns. Blocked users can be manually unblocked by administrators or automatically unblocked by the system scheduler once the blocking period expires.
Limitation
Invalid user verification attempts for FIDO2 Passkeys authentication (incorrect PIN or biometric verification) are tracked on the platform or roaming authenticator itself, not in ADSelfService Plus. Additionally, certain authenticators like Duo Security, YubiKeys, or smart cards have their own independent blocking mechanisms that operate outside of ADSelfService Plus. These external authentication attempts and blocks will not appear in this report.
Prerequisite
You must have administrator or technician-level access to the ADSelfService Plus portal to generate and view reports.
Generating the Blocked Users Report
To generate the Blocked Users Report:
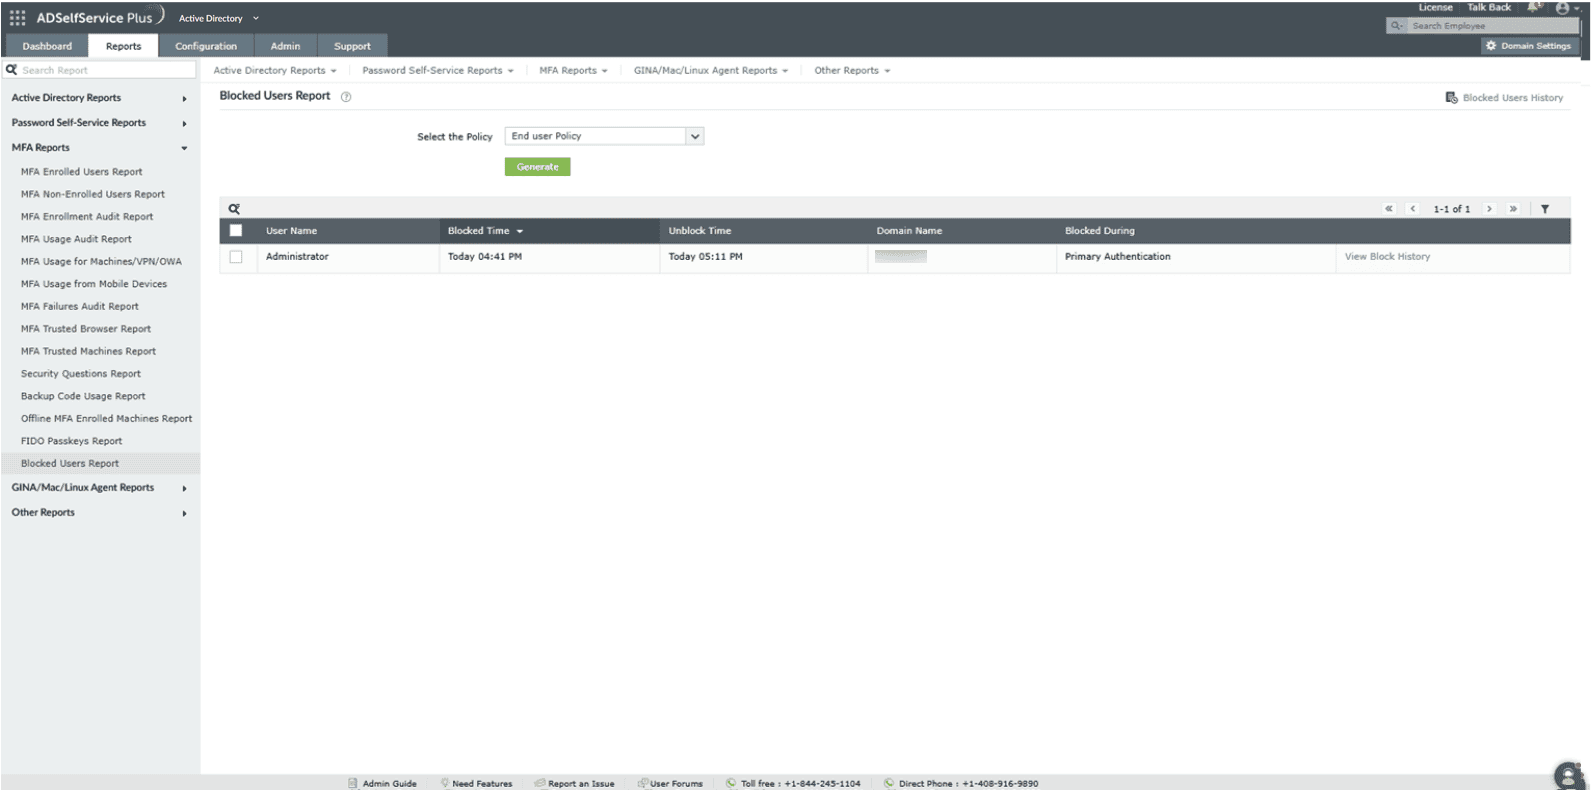
- Log in to the ADSelfService Plus portal with admin or operator privileges.
- Navigate to Reports > Password self-service Reports > Blocked Users Report.
- Choose the policy for which you wish to see the list of currently blocked users. Choose All Policies if you wish to see the users currently blocked across all the policies configured for the domains you are permitted to view.
- Click Generate to generate the report.
Unblocking users
Administrators can unblock users by selecting the users to be unblocked and clicking the Unblock option above the report.
Sorting: Click any of the columns to view the report's entries in ascending or descending order.
Searching: Click the search icon [search-icon] to search for specific data in the columns displayed. Specific users can be searched for using their usernames. Searching works with the criteria contains. For instance, if the word jack is searched, then all the usernames containing the sequence jack will be displayed.
Blocked Users History report
The Blocked Users History report lists previously blocked and unblocked user accounts. The report provides information such as the time of blocking, the time the user was unblocked, the number of unsuccessful MFA verification attempts, the authenticators used, and the entity that unblocked the user (technician or a scheduler).
To generate the Blocked Users History report:
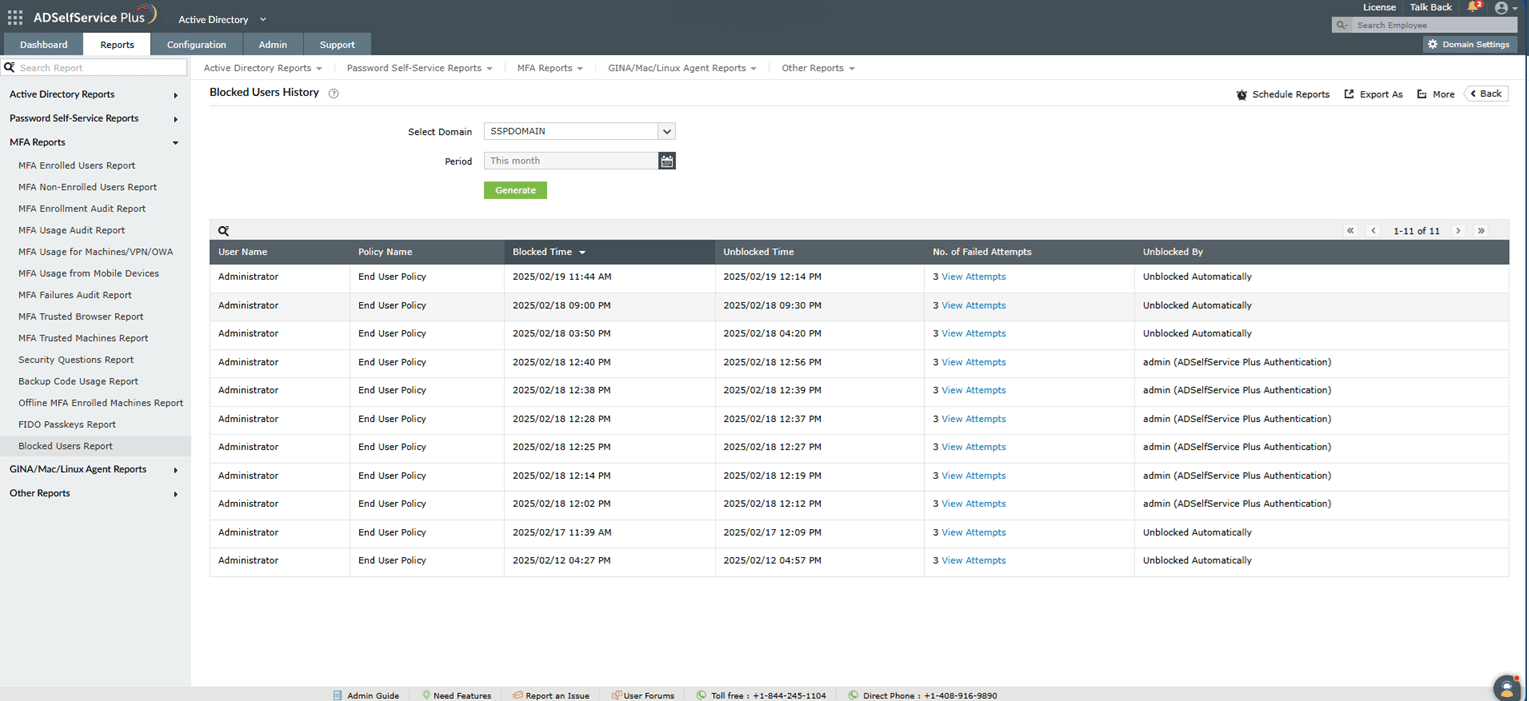
- Log in to the ADSelfService Plus portal with admin or operator privileges.
- Navigate to Reports > Password self-service Reports > Blocked Users Report > Blocked Users History.
- Choose the domain and time period for which you wish to see the list of previously blocked users.
- Click Generate to generate the report.
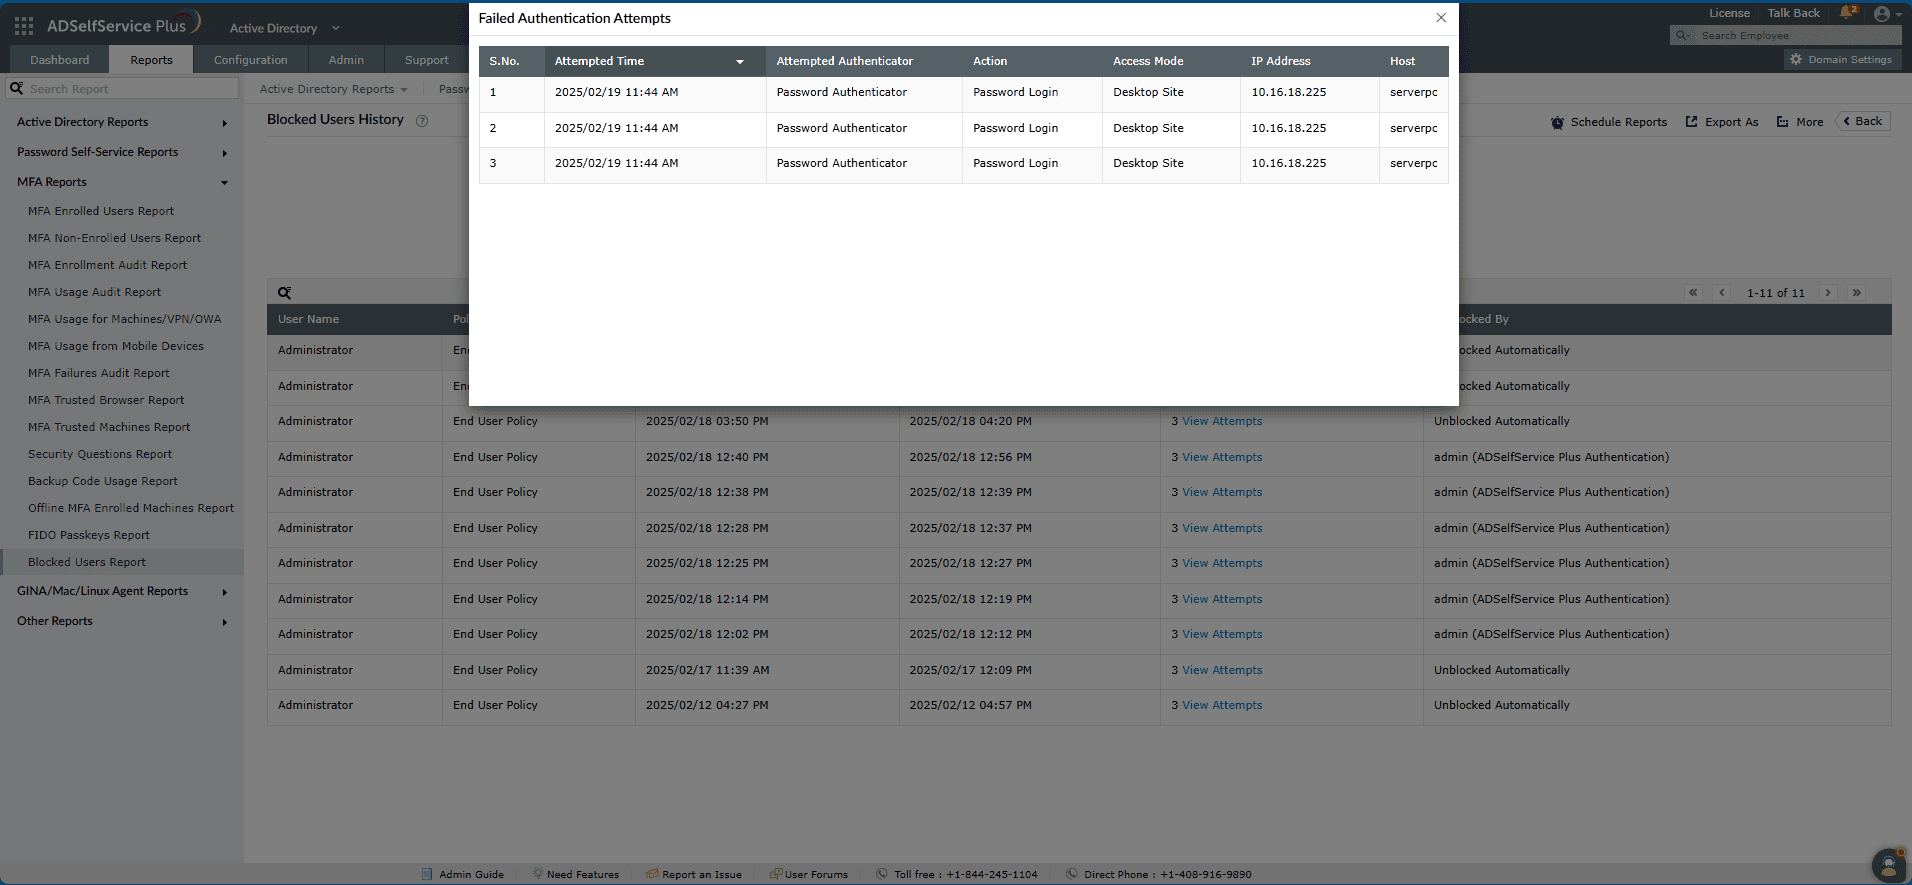
You can access information about each user's previously unsuccessful verification attempts for password resets and account unlocks, including failed MFA and password authentication attempts, by clicking View Attempts.
Automating generation of the reports
The Schedule Reports option at the top-right corner of the page can be used to schedule the generation of these reports at specified intervals, and automatically email them to administrators or specific email addresses. Learn to schedule reports here.
Exporting the reports
- The Export As (
 ) option at the top-right corner of the page helps export the report in CSV, PDF, XLS, XLSX, HTML and CSVDE formats.
Tips
- The More option at the right corner of the page lists the Printable View, Send Mail, and Export Settings options.
- The Printable View option can be used to preview and print the report.
- The Send Mail option can be used to mail the report to the desired email addresses.
- Additionally, you can configure custom Export Settings, such as a personalized title for the report and a header logo that you may wish to display on each page.
- Investigate before unblocking: Before manually unblocking users, click View Attempts in the Blocked Users History report to review their unsuccessful verification attempts and authenticators used. This helps determine if the block was legitimate (security threat) or accidental (user error).
- Balance security and usability: Schedule regular reports to security teams to track blocking frequency across the organization. If blocking rates are excessive, consider adjusting MFA attempt thresholds or providing better user guidance to reduce legitimate user lockouts while maintaining security.