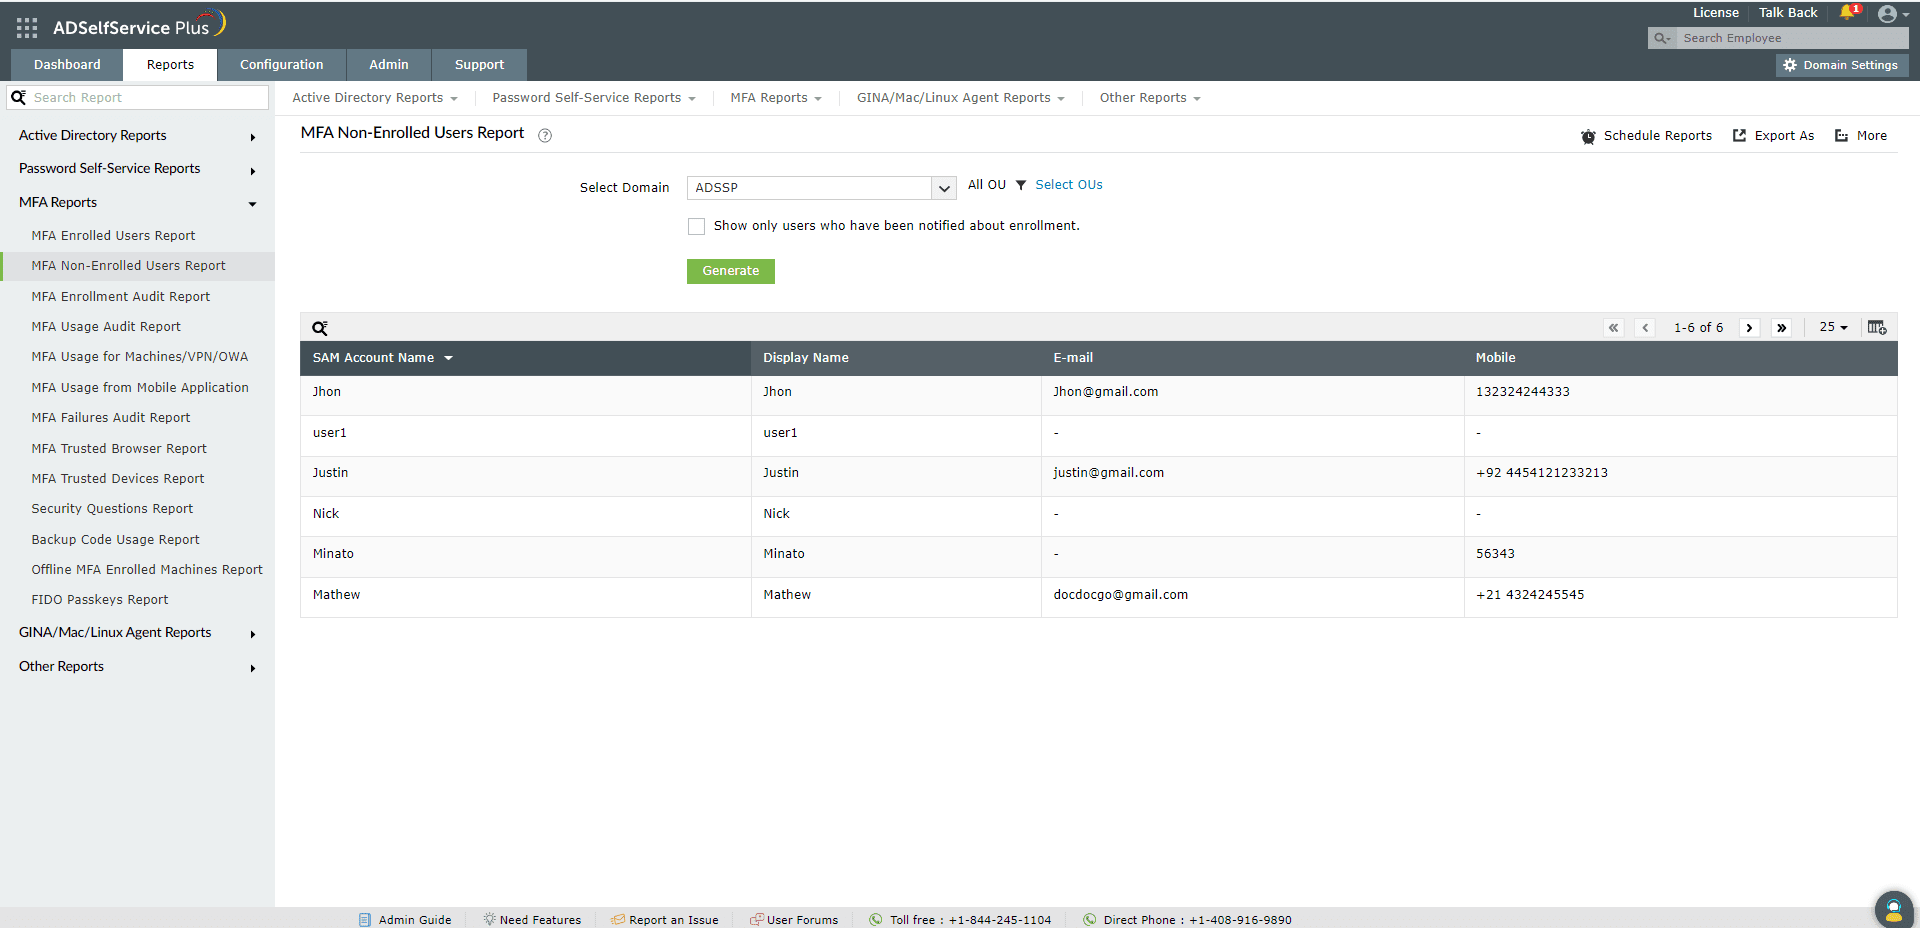
MFA Non-Enrolled Users Report
The MFA Non-Enrolled Users Report presents the list of users who are yet to enroll for multi-factor authentication (MFA) in ADSelfService Plus. This includes users who do not have ADSelfService Plus licenses assigned to them as well as users who have ADSelfService Plus licenses but haven't enrolled for MFA yet. The report also displays the mail addresses and mobile numbers of the users, and the OU to which they belong.
Report filtering and generation :
-
Domain : Specify the domain using the Select Domain option
-
OU : Use the Add OUs option to specify OUs if necessary.
- The Show already notified users only checkbox can be selected if the report has to be generated only for users who have been notified about enrollment. Enrollment notification is used to notify users via email or push notification to enroll with ADSelfService Plus to use the self-service password features.
-
Then, click on Generate to generate the report.
Report customization

- Adding or removing columns: To add or remove columns, click on the Add/Remove Columns[
 ] option at the far right of the report. In the Select the columns to be displayed pop-up that appears, select the required fields under Available Columns and click on the right arrow [>>] to move it to the Selected Columns. To remove columns, select the unused fields under Selected Columns and click on the left arrow [<<] to move it to Available Columns.
- Ordering the columns: The columns' positions can also be altered by selecting a value under Selected Columns and using the Up and Down options to change its position.
Sorting :
Click on any of the columns to view the report's entries in ascending order or descending order.
Searching :
- Click on on the search icon [
 ] in order to search for specific data in the columns displayed.
-
Particular user can be searched using SAMAccount Name,Display Name, E-mail Address, Mobile Number and OU Name.
-
Searching will happen with criteria 'contains' . Ex. if user name is searched with word "jack" , then user name contains "jack" will be given as result.
Schedule Reports, Export As and More
- The Schedule Reports option can be used to schedule the generation of reports at specified intervals, and automatically email them to administrators or specific email addresses. Learn to schedule reports here.
- The Export As option at the right corner of the page helps export the report in CSV, PDF, XLS, XLSX, HTML and CSVDE formats.
- The More option at the right corner of the page lists the Printable View, Send Mail, and Export Settings options.
- The Printable View option can be used to preview and print the report.
- The Send Mail option can be used to mail the report to the desired email addresses.
- Additionally, you can configure custom Export Settings, such as a personalized title for the report and a header logo that you may wish to display on each page.


